The Best Moves Never Played: Key Positions 4
Today we will look at few examples from world champions' practice where one side sacrificed a pawn for positional reasons. In some cases this sacrifice was absolutely necessary, while in the other cases it was optional, even questionable. We will try to figure out what are the positions that one aimed for when sacrificing material.

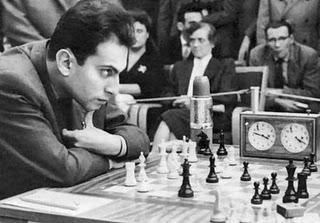
We have reached a critical position from the game Spassky - Tal, where Tal decided to go for a positional pawn sacrifice. How to evaluate this position? It is probably close to equality. Black has two bishops but white has strong pawn center and potential for the kingside attack. Black pieces are bit cramped and with this pawn sacrifice, Tal gets more central squares for his pieces. However, before diving into the continuation, we have to evaluate two major alternative knight retreats: Nd7 and Ng4.
After Nd7 most likely white will block the d-pawn and prepare his pieces for the kingside attack by transferring rook there: Rf3-Rg3. This is the diagram that shows the probable key position after Nd7 few moves ahead, which you will see in annotation to the game.

Although the computer's evaluation is equal here, to me it seems that this position is more pleasant to play for white. Black's idea is to reposition the knight to c6: Nb8-Nc6 but as soon as the knight leaves d7 white's f-pawn starts moving forward because the e5-pawn will no longer be attacked by the knight.
After Ng5 the following position could arise, where black most likely be aiming for f6 break, which I like more than the resulting position we looked at above. It is favorable for black to open up files because he has two bishops. The computer gives black even a slight edge here.

In the game Tal opted for the third continuation to position his knight in the centre.
After an exchange of a pair of knights white's space became unoccupied and Tal masterly put his rook on d7 to attack the weaknesses on the d-file. Spassky felt the dynamics of the position well and correctly started kingside attack right away. Here white had a continuation that might have challenged black's idea of a pawn sacrifice.
How to evaluate the resulting endgame? White has a rook and two pawns against two bishops. The d and e-pawns would be hard to stop but if black gets the king into the center then the king and two bishops should be able to stop the passed central pawns. Computer evaluates this as +0.31, which is reasonable.
The remaining moves show that white was happy with perpetual check and devised a quite witty way to achieve it.
In the next example, black's position is cramped on the kingside, his g7-bishop is very bad due to most of black pawns being on the dark squares. However, the position is closed and white bishops do not have open files to operate on. Botvinnik decides to open up the game a little to give more space for his bishops and rooks. This cost him a pawn. On the other hand, he could have started the play on the queenside for free.
I am not sure why Botvinnik did not go for this position.

White has plenty of play on the queenside. After opening the a-file white will direct the rooks there and get to the 8th-rank. White is much better there and according to a computer program +/-1.3.
With the last move, white is clearing the 2nd-rank for the rook lift to the f-file. Black has to counter this plan somehow; if he waits patiently he will suffocate. Putting the knight on d4 will free up some space for other black pieces. The knight will be active on d4 and if white captures it black will recapture with the e-pawn to have the e5-square for the g7-bishop. The knight will help black to create a counterplay on the queenside.
Black chose an erroneous plan, and after f6 completely closed his bishop on g7, after which he was effectively down a piece. Botvinnik finished the game with the precision of a master.
In the next example both queens are under x-ray from the opponents' rooks. White found an excellent positional possibility to keep the c-file closed, but it cost him a pawn. The decision was fully justified, as all the other moves led to a worse position for white.
Today we looked at few examples with positional pawn sacrifices. Next week we will continue with key positions from classics.

