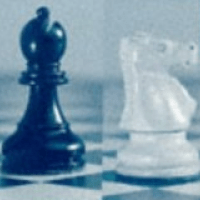
The Knight v. The Bishop
Initially, I was planning to show at least 3 endgames in this article from my recent play. As I started analyzing the first endgame position, it happened to have a lot of hidden resources and I decided to split the article into a few, so we can go in-depth in understanding the endgames played.
The endgame presented here is from the first round of the recent Canadian Open in Toronto. After having a solid plus out of opening and in the middlegame I went wrong somewhere, ending up in the following position. To an inexperienced eye it might look even better for black as currently black is in possession of the only file, has more space on the queenside and has a bishop that does not let the white knight into the game. Most of these are temporary plusses and will vanish shortly.
In the best case scenario I will end up playing a bishop vs. knight endgame where the pawn structure is locked and my bishop cannot get at the white pawns as most of them are on light squares. In the worst case scenario I would need to defend the queen + knight vs. queen + bishop endgame, which you might guess will not end well for me taking into account my poor king placement. Considering future sufferings without a glimpse of hope I offered a draw and I want to give credit to my opponent who was apparently unfrightened by my high Canadian rating of 2429 and kept playing on.
During the game I was optimistic about this position because it looked like I can cover all the entrance squares through which the white knight and the king can get into my camp. Because my pawn is on a7 (lucky me) the knight cannot get through on the queenside, as the b6 square is covered. If I allow the knight to f5 it would be practically impossible to hold as white would threaten the weakness on d6 and at the same time advance with the king. The knight can get to f5 through g3, e3 or h4. The bishop on g5 covers the e3 and h4 squares, so if the knight is on g2 the bishop must be on g5. Another dilemma was to trade or not to trade the h- pawn for the g- pawn. It is a well known postulate that the defending side should trade the pawns, however not in this endgame. Paradoxically, the g3- pawn limits the maneuverability of the white king, and it is also a weakness: as soon as the white king decides to go to the queenside I will attack it. Also, the g- pawn takes away the important square g3 from the white knight.
So, I held the endgame pretty easily but the real question is if the knight gets to f5 and the white king to the 5th rank is the position lost? In the following analysis I tried first to outshoulder the black king to get the white king into black’s territory but in vain. Then, I tried the plan with a3 and trading pawns on b4, which proved to be a dangerous plan for both sides. Surely, there is vast territory for both sides to commit mistakes and one can play on such endgames but my evaluation is that black can hold this endgame. In a practical game one should try to limit the opponent's play as much as possible and not allow the positions with the knight on f5 to happen.
Today, we saw an endgame that I had to defend, which started out as a heavy- pieces endgame and then reduced to the bishop vs. knight endgame. It was essential for my opponent to keep the queens on the board to use the queen+ knight tandem against my king. The bishop vs. knight endgame turned out to be not as dangerous for black even with the knight at f5. During the game it is hard to assess the resulting endgames properly and one should try not to get into positions where there are doubts about whether it is possible to hold. With a precise decision of keeping the h- pawn and the g- pawn on the board I eliminated the possibility of white getting into my camp and thus easily held the endgame. Next week we will look at another endgame example from my recent play.


