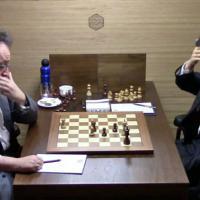
Initiative in Endgames, Part 3
A blunder at the end of the game... is it an accident or something one can predict? Wang Hao had to defend against Gelfand for a large chunk of the game and at last equalized only to lose a move later. We will not try to do neuroscience here and explain what region of the brain is responsible for Hao's mistake but instead we will go through the game and find out how each side dealt with the initiative. It was Gelfand inflicting his will on Wang Hao for close to 40 moves, which translates into about 2 hours. Wang Hao defended well but made a few overly optimistic moves (such as f5) that were a sign of him losing patience. Before diving into analysis I would like to remind that this article is the third installment in the Initiative in Endgames series.
White's advantage is partially due to pressure along the semi-open a and open c-files. To neutralize the pressure black ideally would want to exchange two rooks, so that the a5-pawn would be no longer under fire. Two white bishops are controlling some of the key squares on the diagonals f1-a6 and h2-b8 such as c7 and b5. The black knights for now cannot compete with the white bishops but in future if white procrastinates the knight on b4 or c4 can become very strong. Exchanging one of white's bishops is in black's favor as it will rob white from the two bishops advantage. Now that we tentatively have an idea of what challenges black faces, white has to find a way to keep the initiative but not let black achieve his goals. Gelfand found an excellent solution! He exchanges queens and by doing so he eliminates one of the key defenders of the queenside. Due to the weakness on a5 black does not really have a way to fight for the c-file and tries to rid himself of this weakness asap.
It seems that black successfully solved the problem of the a-pawn weakness. However, white still has control of the c-file and the a3-bishop is awkwardly placed. White finds a key weakness in black's position: it is the d7-knight. If you look at the knight it has almost no good squares to go to. It limits the f6-knight's maneuverability and is easily attacked with Rc7. Gelfand converts the initiative he has into an extra pawn.
White is up a pawn but because all the pawns are on the same wing this is not a big advantage for an endgame. As Gelfand mentioned in his postgame interview: "I converted to a pawn, I don't know if I could do better.. It is a type of a position where it is 50-50 chances for win or for draw". One will try to get space on the kingside so as to have room for the king and minor pieces. Black wants to exchange all the pieces but leave one pair of rooks because in rook endgames the draw would be the most likely outcome given this pawn structure. White will try to create a passed pawn, which most likely will be the d-pawn. The next stage of the game is where one's class shows up. There are no forced moves and no clear plans but rather general ideas of what positions one should achieve. In my opinion having asymmetrical material composition benefits white. This is probably one of the reasons Wang Hao has not exchanged his central knight for the bishop for quite some time.
After a long endgame fight black achieved the ideal endgame - with only one pair of rooks left. The price Wang Hao paid to get this endgame is high but still sufficient for a draw. We can say that white has initiative in this endgame due to the active rook, the passive black king, which is cut along the 7th-rank and the active white king. The f6-e6- pawns prevent the white king from penetrating black's position. Otherwise, if the white king manages to get to the 6th-rank there would be unpleasant checkmating threats. It is not easy for white to create a passed pawn. For example if e4 then the rook will stand behind the d-pawn preventing it from advancing, and if Ke4 f4-f5 or d5 then the rook can either attack the e3-pawn so white king will not be able to get to the 5th-rank, or wait on the 5th-rank so the pawns cannot easily advance there. Certainly, white exerts significant pressure and it is far from easy to play this position at the board. Black should be extremely patient and not make any moves that are the products of exhaustion.
Although the material is balanced one has no doubt who has the initiative in this position. Gelfand once again went for the transformation of advantage from an extra pawn to an active king position. Although, Wang Hao ended up blundering in the end his position is far from defendable. In the next 6 moves the position evaluation changed from winning to a draw to winning again after Gelfand found the "last trap". "I couldn't explain this blunder, something must happen wrong with my brain. This is too strange for me" - Wang Hao says. My take on the situation is that if one has to defend all game long mistakes like these happen. This is another powerful aspect of initiative.
Next week we will continue exploring the initiative in endgames series with the Caruana - Carlsen game from the 5th Final Masters that features the topic: dangers of initiative or over optimism.

