My Favorite Classic Games, Part 11
This series is all about the classic games that, as a young teen (15 years of age), affected me in a profound manner. In general, they were positional games since, for a kid that grew up on attacking chess and combinations (12 to 14 years of age), strategic considerations were left behind and, as a result, were alien.
Thus, when I was finished studying games by Anderssen, Morphy, Spielmann, Marshall, Alekhine and Tal, I decided to check out less extreme players and broaden my chess horizons.
The games I will share might or might not be masterpieces; the criterion for this series is that they taught me an extremely important lesson(s) that made me well rounded and much stronger. I’m hoping that these games will teach you the same lessons, thereby improving your positional understanding and helping you become a better player.
This week we are going to look at a game that was a revelation when I first saw it, and it still blows my mind when I play over it today. It’s not particularly complex, and it’s not full of tactical candy.
Instead, it’s incredibly instructive, demonstrating the battle of mutual imbalances (in this case each side has a pawn majority), how to maximize one’s knight, and how to create an artificial support point.
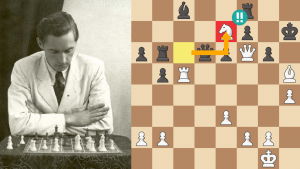
In this article I’ll show how Nimzowitsch successfully carried out his plan due to strong play and a lack of understanding from the White side.

Then I’ll demonstrate how White, if he used a logical plan based on his own pawn majority, might have been successful against many opponents. And finally, I’ll show how proper play for both sides leads to an interesting position with more or less equal chances.
Here are the initial moves that take us to the key position:
The uneducated eye would see a boring position, but the position is actually filled with tension and interesting ideas.
The basics are clear: White has a kingside pawn majority and Black has a queenside pawn majority. White’s knight would love to live on the d4-square, and Black’s knight fully intends to make the f5-square a home for his knight.
This stuff, as simplistic as it might seem, is the map that drives both sides’ future plans.
If you’re not able to read that map, then you’ll also be unable to play the position properly.

This is a game you need to look at over and over until you have a firm grasp of Nimzowitsch’s strategic and tactical nuances. Then it’s time to move on to the next example!
Let’s return to the position after 14...Kb8 and see how White could have improved over his atrocious 15.Qb3.
After looking at Nimzowitsch’s game, you should understand that f5 is a very important square. So, if you chose 15.Qd3 you should be proud of yourself.
Another thought is this: why is Black’s knight getting all the fun? Why can’t White find a home for his horse too? If you decided that Ng3 was the bomb, then you need some fine-tuning since the only reason your knight is on g3 is to make a swap after Black plays ...Nf5. However, 15.Ng3 also walks into 15...h5 when taking that pawn is very risky.
Hopefully, most of you are looking at d4 as the knight’s best home -– it eyes f5 and also spreads its tendrils all over the board. The immediate 15.Nd4 is met by 15...c5, so you need to find a way to prepare Nd4.
That “way” is 15.b4, stopping ...c5 and turning d4 into a support point.
In our first example, Black was allowed to make all his dreams come true: powerful pawn majority vs. frozen enemy majority, killer knight vs. a neutered one, and chances for central expansion by ...d5-d4 and kingside play with ...h5-h4-h3.
In our second example White was on to Black’s tricks and immediately stopped ...c7-c5 in its tracks, then fought for control of the key f5-square. Once that square fell, White was able to push his pawn to f5 when it was his pawn majority that was active, not Black’s.

Now it’s time to see both sides fight tooth and nail for their own individual visions. Nobody will bow to the other, and nobody will allow the opponent to grab the goodies that he so desperately wants to grab.
LESSONS I LEARNED FROM THESE GAMES:
- We saw Nimzowitsch dominate the game by centralizing all his pieces. In our last example, Black (by sacrificing a pawn) solved his problems by shifting the battle to the center instead of the wings. It should be obvious that centralization, an idea attributed to Nimzowitsch, is something you really need to think about.
- In situations with mutual pawn majorities, it’s important to not allow the opponent to freeze your majority, while you do your best to stop his majority in its tracks.
- Creating holes in the enemy position is always something you need to look for!
- Whatever battle might be raging, always do your best to make your minor pieces superior to the enemy minor pieces.
RELATED STUDY MATERIAL
- Read IM Silman's previous article: My Favorite Classic Games, Part 10
- Watch GM Dejan Bojkov's 6-part video series on Nimsowitsch.
- Take a lesson on queenside pawn majorities in the Chess Mentor.
- Solve some puzzles in the Tactics Trainer.
- Looking for articles with deeper analysis? Try our magazine: The Master's Bulletin.


