Initiative in Endgames, Part 4
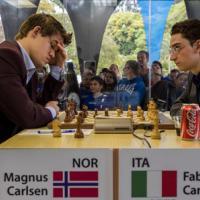
Today's endgame is from Sao Paulo and features a fight between Caruana and Carlsen. Carlsen playing black captured the initiative in the late middlegame and tried many resources to capitalize on it. In the end with two consecutive mistakes he let not only the win slip but also the draw. The game is divided into 6 parts to highlight the critical moments and shifts or adjustments from one plan to the next. Today we will see the first three parts and next week we'll see the last three parts of this endgame. In the first 3 parts Caruana was more or less on the defensive - waiting patiently for his chance and not letting Carlsen to get too far with his initiative. Carlsen implemented a series of small plans to get a position he was aiming for. I don't claim here that he had the final position from the last diagram in his mind but I would not be surprised if he had the pawn structure and the material figured out long before. This article is part of the series on initiative in endgames.
Part 1: White's pieces are discoordinated and Calsen uses this to win a pawn.
We have a rather typical pawn structure resulting from the French defense: white has a bad pawn structure on the queenside and black has a weakness on e6. Carlsen's position is better due to his more active pieces and more space. Particularly, the rook on a2 is cut off from play, and the Nd2/Bc1 still have to find work to do. Black is targeting the weaknesses on f2 and h5 and Caruana has no way of defending them both. Clearly, Carlsen has the initiative in this position and lets see how he translates it into an extra pawn.
Part 2: Taking a risk Carlsen grabs space on the kingside, stabilizing the pawn structure which benefits him.
Many chess players after winning material do not really know what to do with it, but Carlsen knows exactly what he is doing next.To keep initiative one has to be aggressive and accumulate positional or material advantages. Here, Carlsen pushes the kingside pawns forward thus securing space advantage on the kingside which will prove useful in future. In doing so, he takes a risk due to tactical complications and almost loses a part of his advantage. Also the pawn structure becomes fixed making it easier for both sides to come up with plans. This pawn structure change benefits Carlsen because he has the initiative and he is the one that comes up with the plans, while on the other hand Caruana has to be patient and on the defensive.
Part 3: Carlsen finds a way to trade a pair of rooks by placing a king on a5.
What are the plans available to black? The h4-break is out of the question because the Bg5 is guarding it. It leaves black with play on the queenside: a5-b5-b4. It will be accompanied with massive rook exchanges on the b-file and the resulting opposite-colored bishop endgame is drawn. There is another plan for black, which Carlsen successfully realized: activating the king. This can be only done if one pair of rooks is gone because otherwise there is a possibility of checkmate threats. By putting the rook on b6 black can threaten to get the b-file, so white cannot allow it and should play Rb1 himself. Then Rb6 will not be too favorable for black because after Rxb6 he would have to recapture with the a-pawn. By bringing the king to a5 Carlsen not only threatens to get to the a3-pawn but also secures the b6-square for the rook exchange.
Carlsen has a position that he probably was aiming for but it might be not enough for a win. He still has the initiative and it is due to the extra pawn and a clear plan in bringing the king to the centre. On the other hand, white having a passive bishop on h4 has to still wait and try to counter black's plan on getting the king to the centre. How the two sides managed to implement their plans we will see in the next article.


