Lezioni

Lezioni

Step Up in Tactics

Step Up in Tactics

Get ready for some next level tactics!

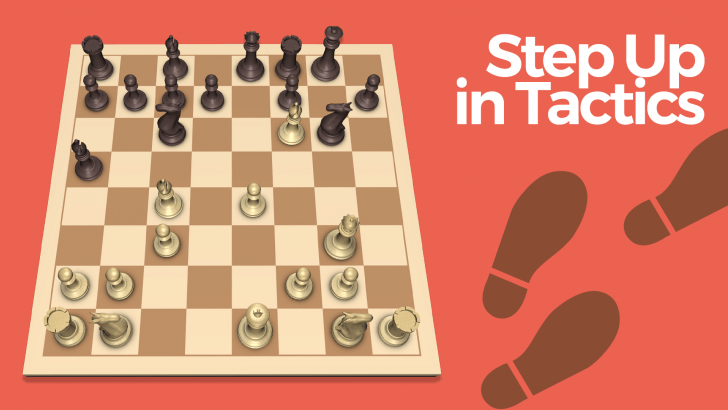
Did you get through the Introduction To Tactics course? Then this is the course for you! Step Up in Tactics will take you to the next level. This module presents exercises, both checkmates and tactical, which are somewhat more difficult than the material covered so far. Continue improving your tactics today!

Here is what you will learn:

  • Find a way to catch a king in the center!
  • Checkmate a castled king!
  • Win material with forks, pins, and other key tactics!

Castle in trouble!

Black's king is in big trouble. Many White forces point at the king making a quick execution possible.
2 sfide

Demolished castled Position!

Black's material advantage is small consolation for the ruined king's position! When possible, one should avoid getting doubled pawns in front of one's king.
2 sfide

Open Sesame

White is a rook down. However, Black's forces exhibit such poor coordination that White is bound to have some good moves here! Can you figure out the way to open Black's fortress?
2 sfide

Dangerous lines!

White sacrificed a minor piece to reach this position. Too many lines are open on the Black king. Which of these tempting avenues should White select to swiftly end the game?
2 sfide

Unsafe King!

White gave up two pawns to reach this position. All it takes is a little imagination to bring about the fall of Black's sovereign!
2 sfide

Minor problem!

White is the exchange up in this queenless middlegame (the difference between a minor piece and a rook). However, Black has a raging initiative due to the terribly exposed position of White's king.
2 sfide

Nasty Surprise!

White is a pawn up, but Black appears to have seized the initiative. Black just attacked the White queen with the bishop on b5.
2 sfide

Stranded King

White sacrificed a knight to force the Black king to d8. White can certainly transform this asset into something more tangible, but what is the right way?
2 sfide

The Key to the Fortress!

Black is behind in development and has definitely lost control over the game. The position of the Black king on f8 doesn't inspire much confidence!
2 sfide

Concealed pin!

Black believed the king to be well guarded. However, White can take advantage of a concealed pin to swiftly mate the Black monarch!
2 sfide

Crossfire!

White gave up the queen to get a raging attack against the Black ruler. Black is totally underdeveloped, giving White has many attractive choices. Which one concludes matters most elegantly?
2 sfide

Pulling the cover!

Black gave up a pawn to reach this setting. White believed that all was safe and just castled queenside. Often it is too dangerous to place the king right next to a diagonal that is controlled by an opponent's piece.
2 sfide

King under assault!

White sacrificed material to gain a lead in development and to drive the Black king into the open.
2 sfide

Castle wide open!

White has given away a bishop to open up Black's castled position. Black's king position on g7 doesn't inspire much confidence.
2 sfide

Heavy pieces!

White's raging attack over Black's poorly defended king easily compensates for the small material deficit: three pawns for two bishops.
2 sfide

King in dire straits!

Black's awful king position can be exploited by White. Too many White units are aiming at the Black monarch on the open file.
2 sfide

Hanging queens!

White is apparently in trouble. White is down a piece and Black now attacks White's d4-pawn, the c4-bishop, the g5-knight, and the f1-rook.
2 sfide

Flank Attack

Black's knight on h2 and the d5-pawn are hanging while the situation in the center is unresolved.
2 sfide

Who mates first?

Black seems to have a good position, with two knights and a mate threat. White only seems to have a few spite checks, but...
2 sfide

Opening Surprise

White has sacrificed a knight on d5 and the knight on g5 is hanging as well. On the other hand, both White bishops are controlling the long diagonal.
2 sfide

Key to the fortress!

White sacrificed a pawn in the opening for an initiative which now has turned into a raging attack against Black's king.
2 sfide

With Interest

How can White best demonstrate that there's compensation for the sacrificed material?
2 sfide

King on fire!

White sacrificed a rook to invade Black's camp. Black's pieces are too randomly placed to help the king on the edge.
2 sfide

Centralized king

Black sacrificed a queen and a knight to attract the White king in the middle of the board. The problem is how to deliver the right checks.
2 sfide

Defense or attack?

At first sight things don't look good for White. Black is a queen up and threatens mate on g2 with the queen. But Black's king is still in its original position. This factor alone gives White chances.
2 sfide

Back to the Wall

White has sacrificed a lot of material to achieve this attacking position. Black, on the other hand, is struggling to develop and to defend the king.
2 sfide

Cutoff Man

White has sacrificed a rook to get a promising attacking position. Black's pieces are not in good shape to help protect the Black king against White's direct assault.
2 sfide

Alexander-Bogolyubov

Efim Bogolyubov, playing Black, was twice the challenger for the World Championship. In both matches he was defeated by Alexander Alekhine.
2 sfide

Rybkin-Marchenko

White has sacrificed a rook for this position. In compensation Black's king is exposed to an attack by the White queen and rook and the Black queen is very poorly placed.
3 sfide

The Deceptive Knight

This is a roughly even endgame in which White has an extra pawn. In many positions, this pawn would be insufficient for a win, but here White has a few advantages.
3 sfide

The Great Knight Fork

Black is doing well according to common knowledge. The queen slightly outweighs the rook and the knight, but more importantly, Black's king appears much safer.
3 sfide

Pawnpower

White has an extra pawn on e5, but the realization of such an advantage is often difficult in this type of ending with many minor pieces.
3 sfide

The Soul of Chess

In this position, originating from a Closed Sicilian Opening, Black can use pawns well in order to demonstrate that White's piece development was a bit careless.
3 sfide

Shaky Center

This sharp position has arisen in the English Attack of the Sicilian Defense. You're playing Black. Is there something White has overlooked?
3 sfide

Transition from Middlegame to Ending

White must chose between a tempting mating attack against the Black king and an advantageous conversion of a middlegame advantage into a winning ending.
3 sfide

Pitchfork

White is down a rook, yet Black's king has been forced into the corner. How can you take advantage?
2 sfide

Minor Pieces Against Rooks

White has two rooks and six pawns against Black's three minor pieces and six pawns. Material is about even, yet White's rooks would prefer to be on open files.
2 sfide

Get Out of My Way!

Black has chosen a popular set-up against the Closed Sicilian, and has well placed pieces. Yet, the c5-pawn is hanging, and White's pawn at d5 is threatening.
2 sfide

Converting an Advantage in the Endgame

White is down an exchange, and his rook is hanging. This ending is quite interesting, as all of the pieces are on the queenside giving some tactical opportunities.
2 sfide

Regaining Material

White has just sacrificed his queen on h8. How long will Black be able to enjoy the material edge in view of White's well placed pieces?
2 sfide

Knight Tactics

The opening is a very important part of the chess game. One or two errors in the opening can be enough to lose an entire game.
2 sfide

A Goal Assist

White has an extra pawn in this ending. But with only one pawn left, if Black can sacrifice a bishop for the pawn White's king and bishop will not be sufficient to win.
3 sfide

Choke Hold

Black is up a pawn. But the Black knight is passively placed and it doesn't seem easy to exploit the advantage. Is there a quick way to win?
2 sfide

Cross-pin

Black, hoping to win the White queen, must play carefully in order to avoid defeat.
2 sfide

Dark Square Domination

Material is even with Black having a strong bishop for White's knight. How can you prove that the bishop matters?
2 sfide

Long Diagonal

White is a full rook ahead in this Benko Gambit middlegame as Black has just taken the pawn on b2 with his rook.
2 sfide

Pinned Knight

White's knight on d4 is attacking the Black rook on e6, yet the other Black rook pins the knight to the White queen. Material is even, yet there are tactical chances.
2 sfide

Deadly Pin

Black's pieces on the back rank are having trouble finding active squares, especially the bishop at c8 which is locked in by its own pawns in the center. How should White best continue to keep the attack alive?
2 sfide

Troublesome Pin

Black's rook is on an excellent square and pins the White knight on d4 to the queen. Black must be able to take advantage of the pin immediately.
1 sfida

Tactical Pawn

White has sacrificed a queen, and for a moment one may think White is losing. What compensation may White have for a whole queen in the absence of a mate in one?
2 sfide

Passed Pawns

Black has just taken a rook with the queen in order to slow down White's attack.
2 sfide

Tortoise and Hare

Rook endings are notorious for their tactical tricks. This is especially true when there are many pawns remaining on the board.
1 sfida

Chivalry

Material is even in this knight ending. However the far advanced a-pawn gives White a winning edge.
3 sfide

Noah's Ark

This position came about from a Ruy Lopez where White played d4 and the queen recaptured on d4 after an exchange of knights.
3 sfide

A French Lesson

White is down an exchange, yet the active rook and knight, combined with the passed e-pawn give plenty of compensation.
2 sfide

Cute Escape

White is down a bishop and three pawns in this ending. It truly seems to be a position that most tournament players would resign without blinking twice.
2 sfide

Fragile Center

Center pawns were just exchanged on e4 which brought the White queen out to e4. The White queen looks quite strong on this centralized square.
2 sfide

Connected Pawns

This ending is characteristic of the rook's attempts to stop two connected passed pawns. Without the help of the White king or any other piece, the efforts of the rook are in vain.
2 sfide

Undefended Pieces

White's pieces are all working well together, leading to some good opportunities. Try to find them.
3 sfide

Crowded Area

Material is level. If White isn't careful, Black will go after the weak pawn on a3. Hopefully you can find a good trick.
3 sfide

Criss Cross

White is up a pawn and stands to win. What is the quickest way to end the game?
2 sfide

Reshevsky-Savon

This is a position from a game played in Petropolis, Brazil in 1973. Sammy Reshevsky, playing White, was probably the second strongest player in U.S. history before Fischer.
3 sfide

Too Aggressive

White is down a rook and a pawn, but has strong threats against Black's uncastled king, including mate in two moves. It's Black's turn. How can you turn things around?
1 sfida