Rook
The rook is the second most powerful piece in chess! It is a long-range piece and is notorious for delivering back-rank checkmates!
Here is what you need to know about the rook:
- The Rook
- How The Rook Moves
- Rook Checkmates And Back Rank Mates
- Doubled Rooks
- Rooks On The 7th Rank
- Doubled Rooks On The 7th Rank
- Test
- Conclusion
- Video Lesson
The Rook
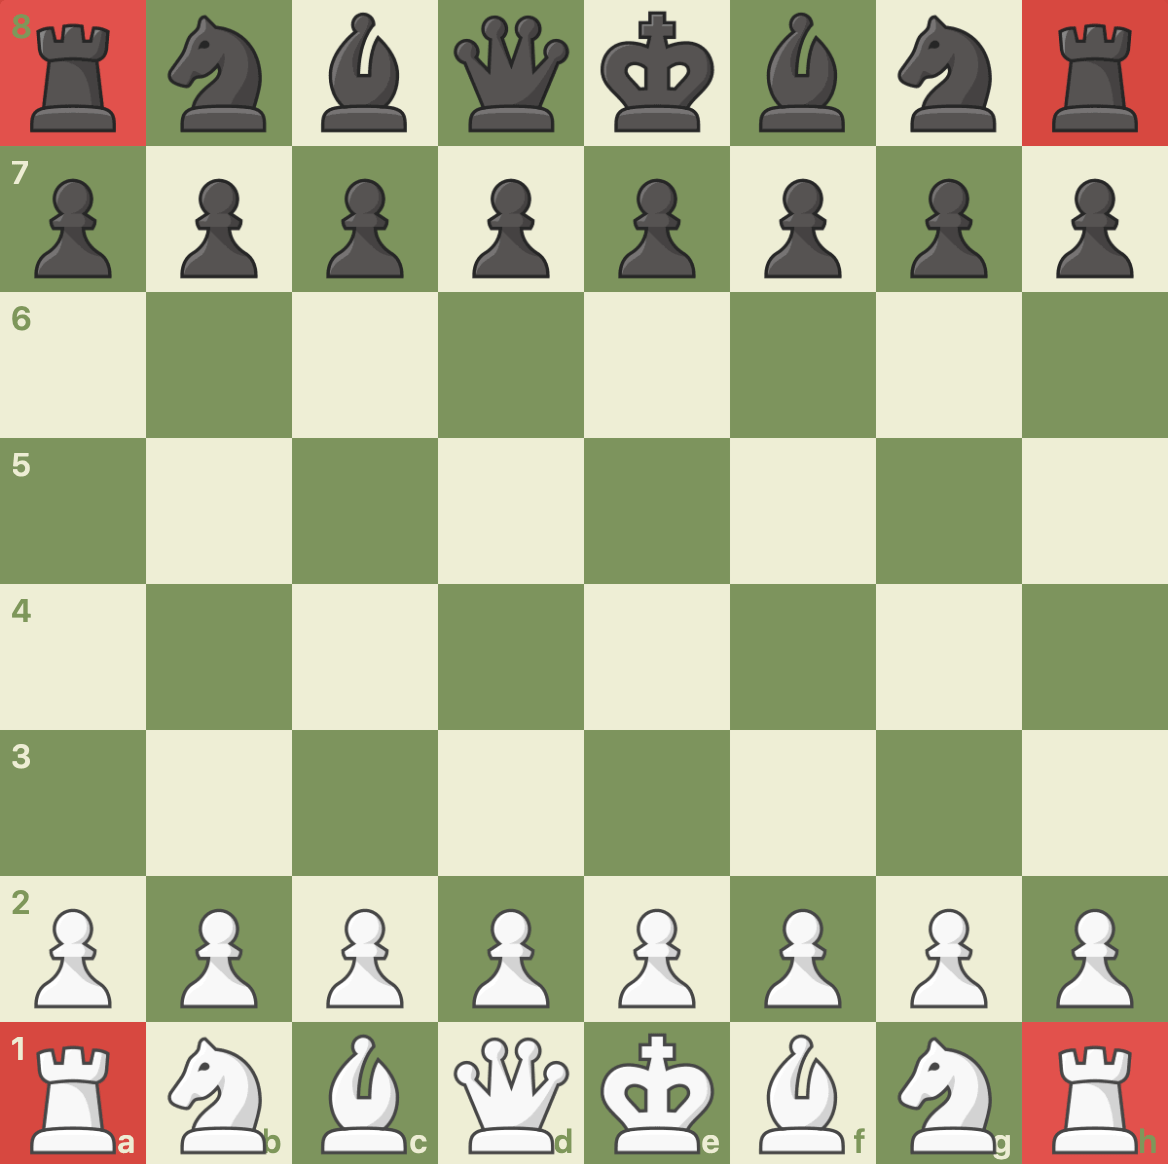
When a game begins, each side starts with two rooks. The rooks begin the game in the corners of the chessboard: White's rooks start the game on a1 and h1, while Black's rooks are located on a8 and h8.
The rook is considered a major piece (like the queen) and is worth five points. It is considerably more valuable than a pawn (one point), a knight (three points), and a bishop (also three points) but is less valuable than a queen (nine points).
How The Rook Moves
As mentioned, the rook is the second most powerful piece (behind the queen). The rook can move forward, backward or sideways, but cannot move diagonally (like a queen or a bishop). The rook can move up or down vertically on any file. In the following diagram, you can see the rook's potential moves highlighted on the e-file.

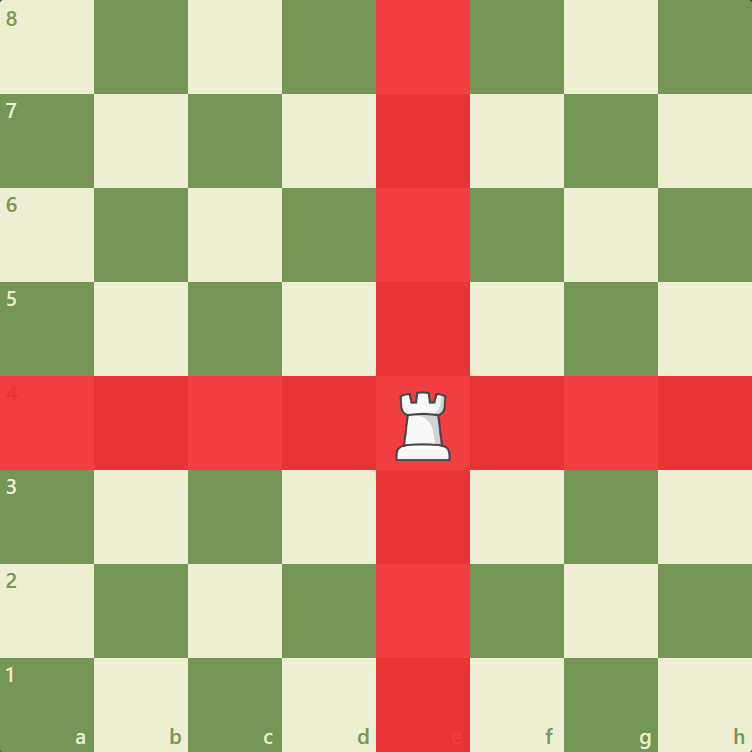
The rook can also move left or right horizontally on any rank. In the following diagram, you can see the rook's potential moves highlighted on the fourth rank.
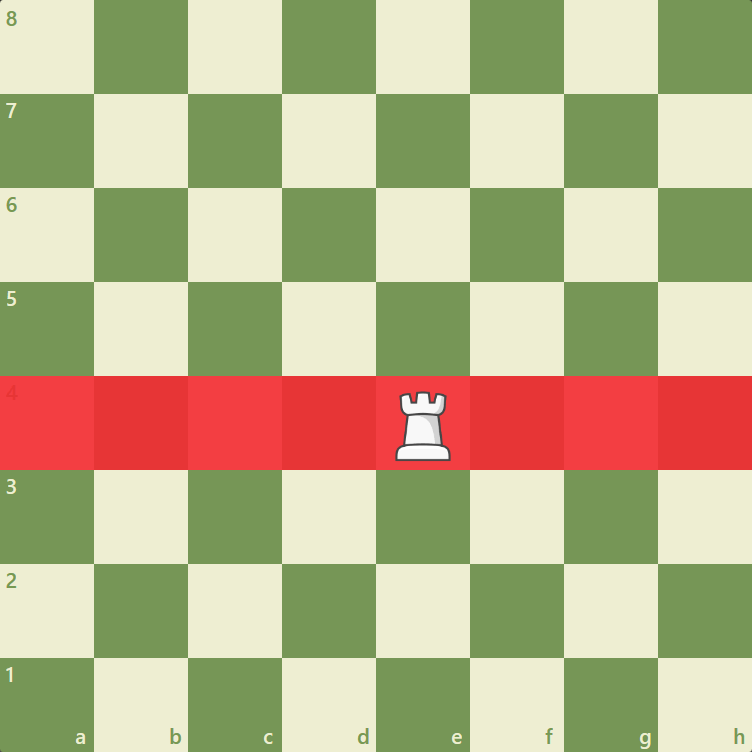
One way to remember how the rook moves is that the pattern looks like a plus sign (+).
The rook can move as many squares as it likes as long as it is not blocked by another piece or the square is not occupied. For this reason, rooks are effective when placed on open or semi-open files (because they are not obstructed by other pieces).
The rook can capture an enemy piece by moving to the occupied square. Please note that the rook cannot jump over pieces like a knight—if it is blocked (like in the starting position), then it cannot move!
Rook Checkmate And Back-Rank Mate
The rook can deliver lots of different kinds of checkmates, but here we will cover three of the most common rook checkmates: 1) a single rook mate, 2) a double-rook mate, and 3) a back-rank mate.
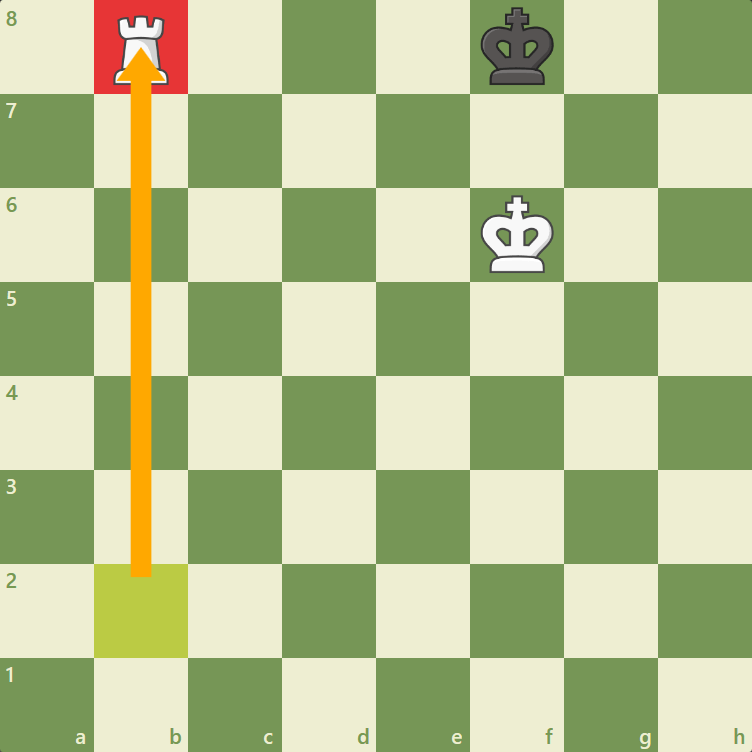
Unlike the bishop or a knight, a single rook can checkmate with the help of a king alone. In the following position, White has just played Rb8#! Please note that the white king on the f6-square takes away any forward moves from Black's king, while the rook takes away any moves on the eighth rank.
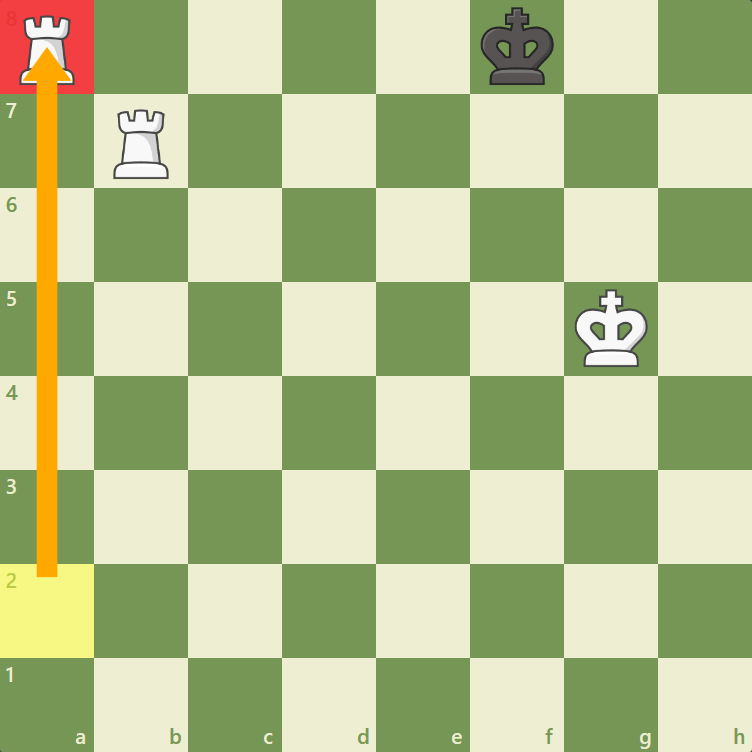
Two rooks can deliver checkmate against a lone king very easily. In the following position, White has just played Ra8#. Please note that the rook on b7 keeps the black king from moving forward, while the rook on a8 takes away any moves on the eighth rank.
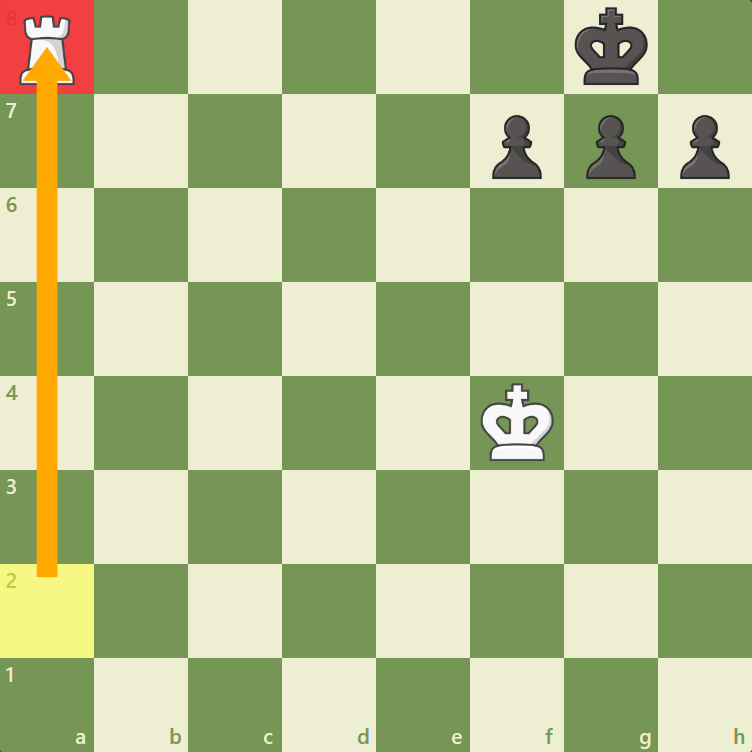
Another type of checkmate that the rook is notorious for is called a back-rank mate. A back-rank mate occurs when checkmate is delivered, you guessed it, on the back rank! Please note that the pawns in front of the king block any movement forward, while the rook takes away all squares on the eighth rank.
Doubled Rooks
One rook on an open file is strong, but two rooks on the same open file are even stronger. In this position, Black’s rook on a8 is the only piece preventing the back rank checkmate we discussed earlier. White can play rook on f1 to d1, doubling the rooks and renewing the back rank threat. Even if Black stops the mate, White can play Rd8+, forcing a trade of Black’s last rook. After the exchange, White is up a full rook and should win without difficulty.

Doubled rooks on an open file can also be used to attack enemy pieces. Here, White’s rook on d2 is attacking the knight on d5, which is defended by only one black rook. White plays rook on f1 to d1, doubling the rooks. Black can’t bring another defender to the knight, so the piece on d5 is lost.

Rooks On The 7th Rank
Another strong rook strategy is placing them on the seventh rank (or the second rank if you're playing Black). A rook on the seventh rank can tie down enemy pieces, force your opponent into passive defense, or keep the king trapped on the back rank. A rook on the seventh rank is also a great asset because it can attack crucial pawns that are holding together a pawn chain or covering the enemy king.

Doubled Rooks On The 7th Rank
You can combine doubled rooks with rooks on the seventh rank to take full control of a position. In this example, White will double the rooks on the seventh rank, making it very difficult for Black to move.

Test
Try these test positions to challenge your new rook knowledge!
Can White's rook on e1 capture the knight on the e4-square?
Can White's rook on c1 move to the c8-square?
Can White double rooks?
Can White bring the rook to the 7th rank?
Can White double rooks on the 7th rank?
Conclusion
You now know where to place the rooks when a game is started, how much the rook is valued, how the rook moves, how the rook contributes to several common checkmates, how to double rooks, and the power of rooks on the seventh rank! Enjoy your new knowledge of the rook, and may your rooks find many open files.
Watch the Video Lesson
Reading an article is a fantastic way to learn new material. For some people, watching a video lesson can be even more helpful! Check out the short video lesson below about the rook!