
Mastering the Endgame - Part One
This post is the first in a series I'll be doing as I journey through the systematic Endgame study book, Silman's Complete Endgame Course: From Beginner to Master. Here's a link to this book on Amazon: https://www.amazon.com/Silmans-Complete-Endgame-Course-Beginner/dp/1890085103. Go buy it! It's fantastic and well worth your money! All of the concepts and diagrams mentioned in this series come straight from the book, and are not my own (I've simply compiled them into a shortened blog format). And any time I directly quote Jeremy Silman from the book, I'll put it in quote marks.
Each post will be on a different section of this book from start to finish, starting with the lesson and ending with a set of questions to test your knowledge on the material (directly following the book). Don't read the next section until you have passed the test of the content from the previous one with 100% accuracy. Though the first few sections are stupidly easy and obvious for most recreational players (myself included), I feel it’s important to go through them all in order so that no nuance is missed, providing comprehensive and systematic learning. So without further delay, let's begin...
Chess Notation Legend:
K = King
Q = Queen
R = Rook
B = Bishop
N = Knight
x = Captures an enemy piece
+ = Check
# = Checkmate
?? = Blunder
? = Mistake
?! = Dubious Move
!? = Interesting Move
! = Good Move
!! = Brilliant Move
Mastering the Endgame
Part One: Unrated - 999
Concepts included in this section:
THE STAIRCASE (checkmating with 2 major pieces)
THE BOX (checkmating with 1 major piece and your King)
STALEMATE ALERT
____________________________________________
THE STAIRCASE - A checkmating method when your opponent has a K, and you have a K as well as a Q + Q, a Q + R, or a R + R.
This method consists of 3 components:
1. "Push the enemy King to one of the four sides of the board." (any of the 28 squares within the arrows in the diagram below, such as where the black K is on c8)
2. "Use one of your heavy/major pieces (Rook or Queen) to cut the enemy King off from a rank or file." (as the R is doing on g6 in the diagram below)
3. "Use the other major piece to check the King off the next file or rank." (as the Q is doing on f7 in the diagram below)
***Remember***
King and Two Queens vs. Lone King: "The two ways you can botch this endgame are to give your Queens away, or to allow stalemate. Avoid those things and you'll win every time."
King, Queen, and Rook vs. Lone King: "Watch out for your Rook--unlike the two Queens, the [enemy] King can approach the Rook and threaten to take it."
King and Two Rooks v.s Lone King: "Rooks usually prefer to check at a distance."
*****************
THE BOX - A checkmating method when your opponent has a K, and you have a K as well as one Q or one R.
This method consists of 2 components:
1. "Use your King!" (A single Q or R can't mate the enemy K. The K must assist, as the diagram below demonstrates.)
2. "Trap the enemy King in an ever-shrinking Box and then slowly but surely tighten it." (as shown in the diagram below)
***Remember***
"If you have a Rook, make sure the enemy King can't capture it." (In the diagram below, if white moves his K away from his R, the black K can capture the R.)
"Black's King can't step into or over the 'invisible' lines that the Queen creates." (see diagram below)
King and Rook vs. Lone King: It's a little more tricky to checkmate with just a R and a K. Just keep in mind that you need to force the enemy K to an edge of the board with your R cutting off ranks while your K blocks the 3 squares directly in front of the enemy K. See an example in the diagram below of how a K + R vs. lone K checkmate can look. Typically you'll accomplish the mating position like in the photo below by "forcing the enemy King to self-destructively step in front of [your King]" (i.e. placing your opponent in a zugzwang position).
These two checkmating methods of the staircase and the box aren't necessarily the fastest checkmating methods, but are the simplest methods for beginners to learn that will provide consistent results (especially under time pressure).
STALEMATE ALERT - One of the most tragic situations in chess is when a player is significantly up in material and clearly winning, yet fails to remember the danger of stalemate (which draws the game instantly). Just be careful to avoid accidentally creating a stalemate position (i.e. when your opponent's K isn't in check, and yet neither his K nor any other pieces have any legal moves because any move would put his K in check). The below 2 diagrams are examples of common stalemate positions, because it is black's turn and black has no legal moves with any of his pieces (regardless how many pieces he still has).

PART ONE TEST:
Now it's time to test your recall of the concepts taught in this lesson. Below are 6 positions. Try to correctly answer the question under each of them. After you're done, you can check your answers at the beginning of my Part Two post where I'll disclose the correct answers. If you don't solve 100% of them correctly, go back over what you got wrong until you fully understand why you missed it and how to get to the correct answer. Only once you understand all of the concepts in this lesson fully should you move on to Part Two. So without further delay, here's the Part One test:
Position 1: White to move - "White has a forced mate in four"
Position 2: White to move - "Is it wise to play 1. Rc7, trapping the enemy King on its back rank?"
Position 3: White to move - "Trap the enemy King in the smallest possible Box."
Position 4: White to move - "How do you finish Black off?"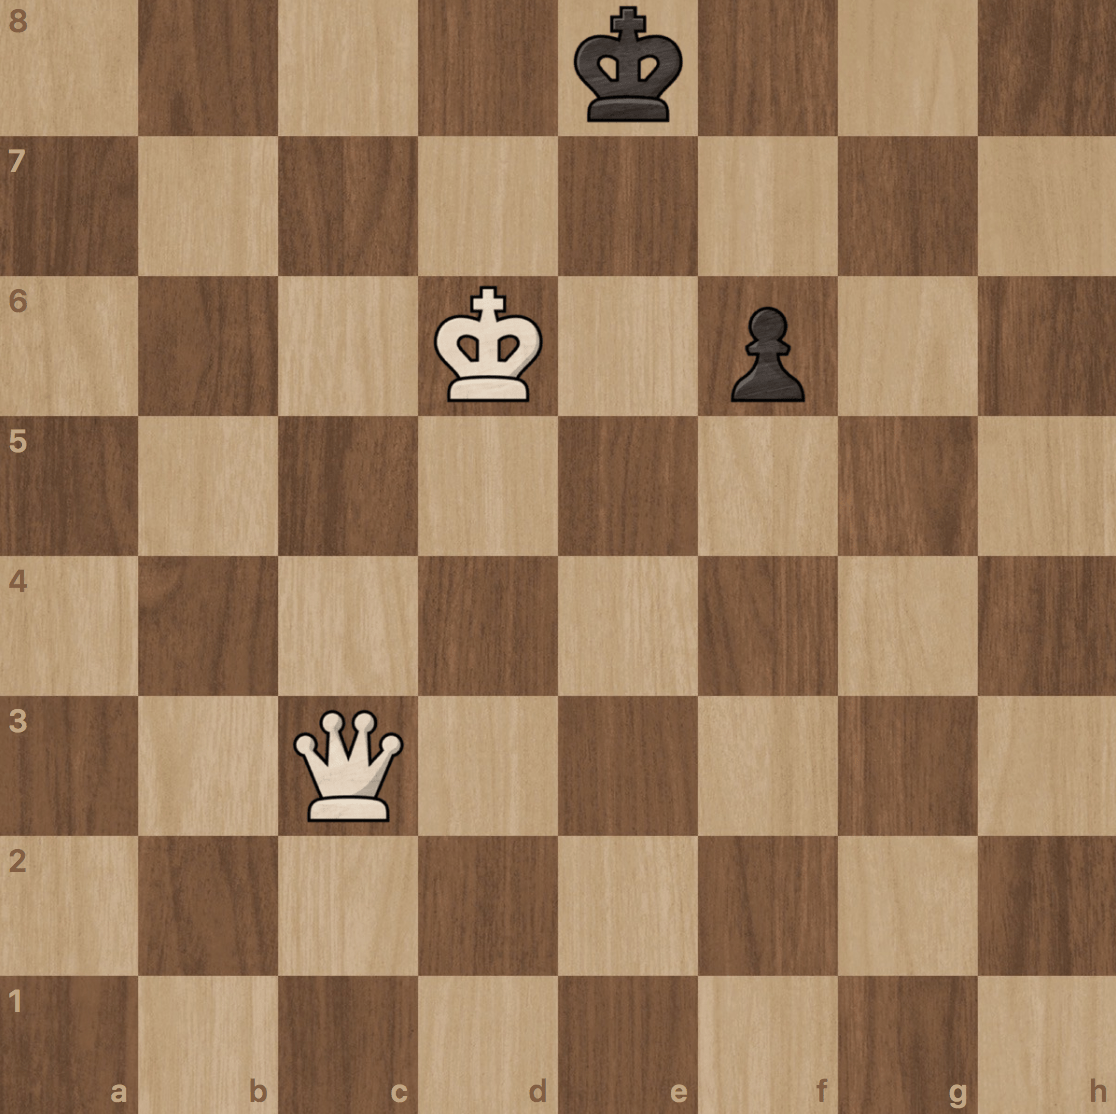
Position 5: White to move - "Can White safely take the pawn on f6 with his Queen? Should he do so?"
Position 6: White to move - "It's mate in one, can you find it?"
And if you'd like to see this content explained in video form in which Tom and I walk through this section together, here it is below: