Winning Pawn Structures: Attacking f7 with the IQP: Part 1
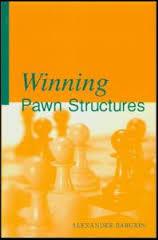
Baburin's Winning Pawn Structures is an absolutely fantastic investigation of the Isolated Queen's Pawn structures. I first encountered this book several years ago and immediately fell in love with the IQP structure owning largely to Baburin's clear explanation of the ideas and plans both for and against the much debated pawn.
Recently, I started another trip through Winning Pawn Structures and decided I would display the games here with my own analysis as a way of cementing the ideas into my repertoire of middlegame plans. As they say, the best way to learn is to teach! And to boot, I think you guys will benefit as well. And for all of you who don't like to read, I've made YouTube videos of each game which explain all the same information you'll find in the game annotations here.
Often material regarding the IQP focuses only on White's d4->d5 plan which obviously is a key plan, but since this idea is so well covered, I've decided to skip that material and look at other ideas within the structure at hand. If you all want me to cover that material, leave me a comment and I will be happy to oblige, however, you can't really do better than checking out Danny's IQP Series where he covers the d4->d5 plan quite well.
In the four games I want to show today, we are going to see a common theme of attacking the f7/f2 square without the d4->d5 advance. They first two games demonstrate a different pawn advance that the IQP player can use to break down the e6 square leaving f7 more exposed; namely f4-f5.
Really a fantastic and instructive game. Our next game features the same idea and even wins more directly.
After these two games, I think you should notice a couple key factors that you can look for to let you know when the f4->f5 plan might be effective:
-
Rook placed on f1
-
Ability to safely place Knight on e5
-
Black Bishop off the c8/h3 diagaonal
In our next game, its Black's turn to have some fun. This time the key difference in the position is that there is no pawn on e3, which means that f2 is immediately more vulnerable to a piece attack. I found it very instructive to watch as Black's play very straight forwardly attacks all the key weak spots in White's position.
To summarize another key point from Black's play, often it can be a good idea to trade your bishops for you opponents knight, especially if in doing so, you increase your own control over the key d5/d4 square.
In our last game of part 1, we witness a classic Botvinnik game where he shows that even if Black maintains a “healthy” pawn on e6, that by no means insures the safety of the f7 square. Check out how Botvinnik uses a thematic sacrifice to completely dismantle the Black center.
Thanks guys for learning along with me! Stay tuned for Part 2 of attacks on f7/f2 in the IQP. As always, thanks for checking out my blog! Be sure to add me as a friend to be notified of future blog entries! Leave a comment. I love to hear from you.
