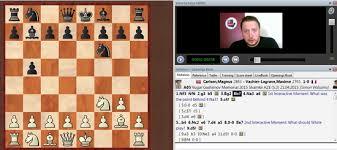
Chessbase Magzine 168 Move by Move Training
I had my first experience of the Chessbase Magazine Move by Move Interactive video training and thought it was excellent. Guided by GM Simon Williams, he covered the Aronian-Caruana game from the Sinquefield Cup. Above all, it's entertaining and engaging, particularly with Simon's anecdotes and chess wisdom.
A learnt much from the training, both in terms of chess strategic thinking and the style of Aronian.
This is how Positional and Tactical position transition.
Training Position 1: White to Move
Which is the most fashionable move and why?
Here I learnt that 5. Bf4 (and not 5. Bg5) is the most fashionable move.
This is because after 5. Bg5 0-0 6. e3 h6 7. Bh4 Ne4 this is the idea of Lasker, allowing exchange of minor pieces.
Training Position 2: How should White handle the centre, given Black hasn't played ... c5
I learnt that White himself plays c5 first. With the e5 square controlled 3 times, Black's can't counterstrike there immediately.
White obtains Queenside space, preventing ... Nb6
Training Position 3: Black has just played ... b6. How should White handles the pawn tension?
My intuitive choice was 10. b4 though I could not see how to answer after the thematic attack by Black as the centre with 10. ... a5 11. a3
From the video, I since have found this idea was tried in Anand-Caruana London 2014.
This idea of 10. c6 is one I'll remember. Controlling b7 and d7 making it difficult for Black's light squared bishop to develop.
The Rook solidly defends the c-pawn.
Training Position 4: Black has just played ... Ne4. How should White answer the threat to his Rook?
I had chosen 13. Rc1
GM Williams brilliant describes why 13. Rc2 is better. It is more flexible, allowing the possibility of the other Rook coming to c1.
He says "this is the difference between a good player and a great player". That's a great quote.
Training Position 5: Black has just played ... e5 to prevent Ne5. How should White continue and why?
Here I correctly chose 15. Qe2 with the idea of preventing ... Ba6 (when Black can exchange this troublesome Bishop).
Similar ideas exist in the French Defence, where White wants to prevent Black from exchanging his bad light squared bishop.
GM Williams recounts a fantastic story when he had a group training session with Bronstein.
Bronstein was going over a complicated game in the King's Gambit, when he asked the participants to find a move.
GM Williams suggested Ng5. Bronstein asked "Why?" Because it looks right. "Buy Why, Why, Why?"
Because it threatens f7. "Argh, young man. Now you are learning how to think in Chess"
Training Position 6: What should White be playing for and how does he best go about it?
I hit upon the right plan with the e4 break being the right idea, but my execution with Nd2 was not the best.
GM Williams explains this very well, in that the Knight at f3 prevents Black from playing the ... e5 break himself.
GM Williams then said something profound to me. That before playing a pawn break, prepare all pieces before hand to their optimum square.
17. Re1 is then logical, because it gets the Rook behind the pawn for the advance.
Training Position 7: Black has just struck in the centre with ... e5. How should White react?
On principle I saw only one move in the "spirit" of the posiiton. 19 e4 creating tension in the centre which can only favour White.
This is because Black has weakened his Kingside with ... g5
Training Position 8: Black has just thrust again with ... f5. How should White respond?
A fantastic training position for listing candidate moves, elimiation and reasoning.
I ruled out exd5 and exf5 as Black gets in ... e4
That led me to 20. dxe5 fxe4 21. exd6 exd3 22. Qxd3 Qxd6 which I chose and was assessed as favourable to White due to the weakened King.
I didn't consider 20. f3 as a candidate move, and this is an instructive lesson to me to hold the centre.
Training Position 9: Black is threatening ... Nxd4. How does White handle this critical moment?
Here I chose correctly 24. d5
This changes the nature of the position. Cuts off the Rook's participation along the 5th rank.
24. ... Nd4 is not possible due to Qxe5+
Training Position 10: White's best move
I disappointingly played 25. Nf3 thinking that this prevents ... Nd4 and attacks e5.
This is meant by 25. ... e4 and all of White's positional gains evapourate.
GM Williams describes that generally all positional games will finish with tactics. If you don't have the firepower to finish a game, your positional play will be of little use.
25. Ne4 does many good things. Hits g5, centralised, blockades the e-pawn.
One must trust that as the Black Knight leaves the Kingside to capture material, most attackers swarm Black's Kingside.
Training Position 11: How does White continue?
To me, this separates the mortals from the immortals. I had seen this idea of Ng5 and Qh5 when I looked at Ne4, but rejected it because I didn't know how to handle ... Bf5 (as Qf7+ gives nothing).
Aronian must have found the quiet 28. Rf1 well before.
GM Williams presents this idea wonderfully: "You need one one or two pieces to attack ... you need three!!"
Observe how then 28. Rf1 Bg6 is not possible because of the thematic 29. Rf7+. If 29. ... Kg8 30. Qh6 and if 29. ... Bxf7 30. Qxh7 Kf6 31. Ne4 mates.
Aronian had to see all these responses from 25. Ne4, plus Black's Qf6 played in the game.
Training Position 12: How does White continue?
Be6 is just a wonderful move. If the Knight captures at e7 then Bd7, and if the Rook captures at e7 then Bxf5 which defends the Rook.
Training Position 13: Can you find the final touch?
